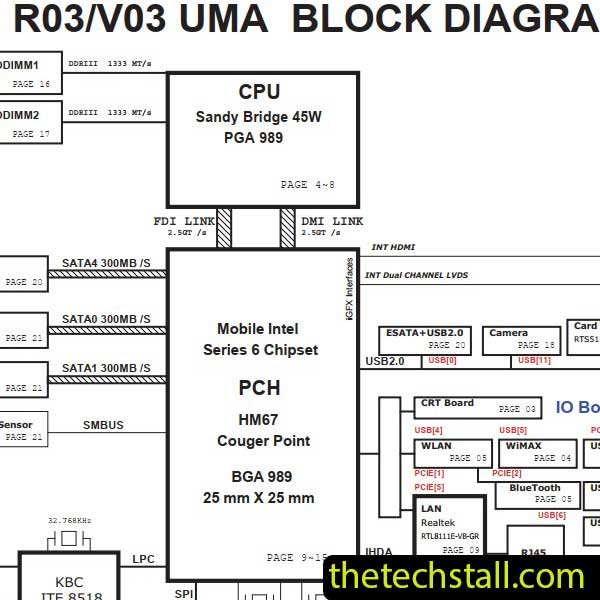
Have you ever found yourself in a situation where your Dell Inspiron 17r N7110 laptop suddenly stops working, leaving you scratching your head in frustration? Fear not, because with the right tools in hand, particularly the DA0R03MB6E0 RevE Schematic Diagram, troubleshooting the motherboard becomes a breeze for any adept laptop technician.
Before delving into the intricacies of troubleshooting, let’s first grasp the significance of schematic diagrams. In essence, these diagrams serve as blueprints, revealing the inner workings of electronic devices like laptops. They provide invaluable insights into the layout of components, their interconnections, and the flow of electricity, empowering technicians to diagnose and rectify issues effectively.
The Dell Inspiron 17r N7110 is a powerhouse of a laptop, renowned for its performance and reliability. However, like any electronic device, it’s not immune to malfunctions, especially those related to its motherboard. When faced with such challenges, having access to the DA0R03MB6E0 RevE Schematic Diagram can be a game-changer.
With the schematic diagram at hand, a skilled technician can embark on the journey of troubleshooting the Dell Inspiron 17r N7110 motherboard with confidence. Here’s a step-by-step guide:
In conclusion, possessing the DA0R03MB6E0 RevE Schematic Diagram in one’s collection equips a laptop technician with the essential tool needed to troubleshoot the Dell Inspiron 17r N7110 motherboard effectively. By leveraging the insights gleaned from the diagram, technicians can diagnose issues accurately, expedite repairs, and restore functionality to the laptop with confidence. So, the next time you encounter a motherboard-related dilemma, remember, with the right schematic diagram, no problem is too daunting to tackle.
Share with friends
thetechstall.com would like to share with you all the resources you need to repair desktop and laptop motherboards for free.
Developed By: Ibrahim Hossen