How to Fix Lenovo Q470 H470 Motherboard Issues – Download Free MS-7C43 Schematic Diagram for Chip-Level Troubleshooting
If you’re a technician or DIY enthusiast dealing with a malfunctioning Lenovo Q470 H470 motherboard, having the right schematic diagram is crucial for effective troubleshooting. Many common motherboard issues—such as power failures, no display, or USB port malfunctions—can be resolved with the right technical approach.
In this guide, we’ll explore common Lenovo Q470 H470 motherboard issues, how to diagnose them, and where to download the free MS-7C43 schematic diagram for chip-level repairs.
Common Lenovo Q470 H470 Motherboard Issues
Before diving into repairs, it’s essential to identify the problem correctly. Here are some frequent issues with the MS-7C43 motherboard:
1. No Power (Motherboard Won’t Turn On)
Possible Causes:
Faulty power supply (PSU)
Damaged power IC or MOSFET
Short circuit in the voltage regulator module (VRM)
Corrupted BIOS
2. No Display (Black Screen)
Possible Causes:
Defective GPU or RAM
Damaged PCIe slot
BIOS corruption
Faulty display connectors
3. USB or Peripheral Ports Not Working
Possible Causes:
Damaged USB controller IC
Broken traces or solder joints
Power delivery issues
4. Overheating or Random Shutdowns
Possible Causes:
Faulty VRM cooling
Defective thermal sensors
Dust-clogged heatsinks
5. BIOS Issues (Failed Updates or Boot Loops)
Possible Causes:
Corrupted BIOS chip
Incorrect BIOS flash
CMOS battery failure
How to Troubleshoot Lenovo Q470 H470 Motherboard Problems
To fix these issues, follow a systematic troubleshooting approach:
Step 1: Check Basic Connections
Ensure the 24-pin ATX and 8-pin CPU power connectors are properly seated.
Verify RAM and GPU are correctly installed.
Test with a known-working PSU to rule out power supply issues.
Step 2: Inspect for Physical Damage
Look for burnt components, swollen capacitors, or damaged traces.
Check for loose or cold solder joints, especially around the VRM and USB ports.
Step 3: Test with Minimal Hardware
Boot with only CPU, one RAM stick, and integrated GPU (if available).
If the system powers on, gradually reconnect other components to isolate the faulty part.
Step 4: Use a Multimeter for Voltage Checks
Measure 3.3V, 5V, and 12V rails from the PSU.
Check VRM output voltages (CPU VCore should be ~1.0V-1.3V).
Test BIOS chip voltage (usually 3.3V).
Step 5: Flash or Replace BIOS Chip
If the BIOS is corrupted, reflash it using a programmer (CH341A or similar).
Replace the BIOS chip if flashing fails.
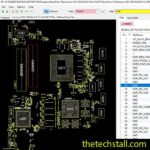
Why You Need the MS-7C43 Schematic Diagram
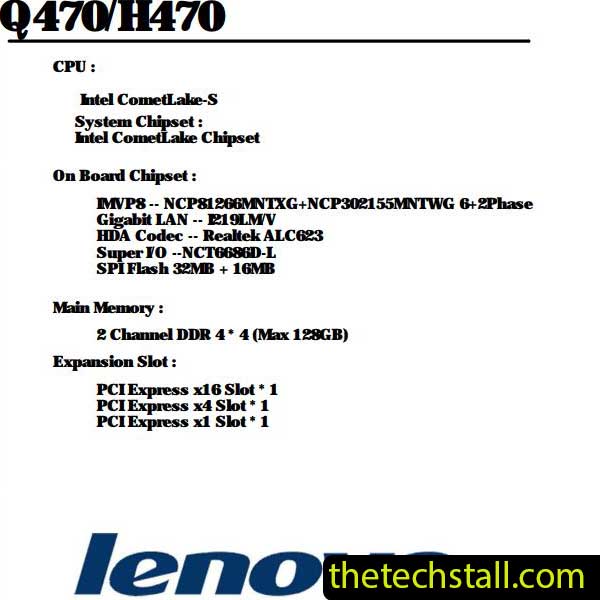
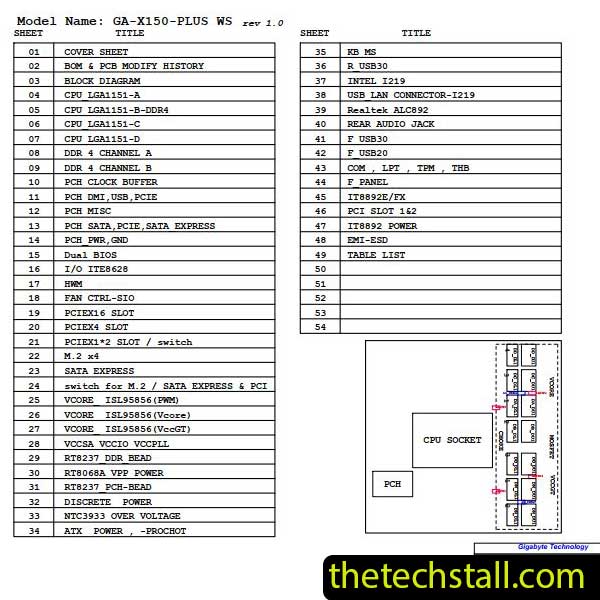
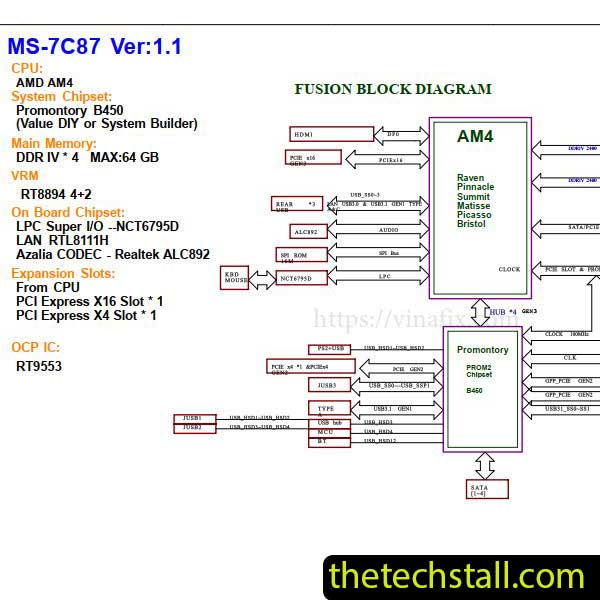
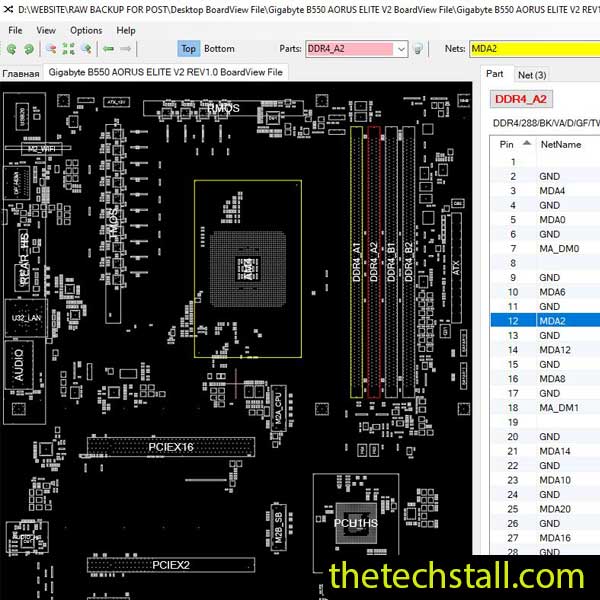
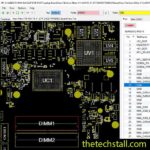
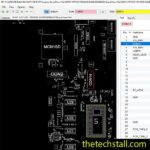
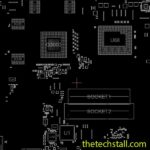
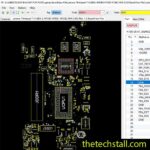
For chip-level repairs, a MS-7C43 schematic diagram is essential because it provides:
✅ Circuit layouts – Helps trace power delivery and signal paths. ✅ Component references – Identifies ICs, resistors, capacitors, and their values. ✅ Voltage test points – Guides where to check for correct power levels. ✅ Signal flow diagrams – Assists in diagnosing communication errors (e.g., between CPU and RAM).
Without a schematic, troubleshooting becomes guesswork, increasing the risk of further damage.
Where to Download the Free Lenovo Q470 H470 Schematic Diagram
Finding an official schematic for modern motherboards can be challenging, as manufacturers rarely release them publicly. However, we’ve sourced a free MS-7C43 schematic diagram for technicians:
Use an ESD-safe workspace to prevent static damage.
Invest in quality tools (multimeter, soldering station, hot air gun).
Document your steps to avoid missing connections.
Refer to the schematic for accurate troubleshooting.
Fixing an Lenovo Q470 H470 motherboard requires patience, the right tools, and a reliable schematic diagram. By following structured troubleshooting steps and using the free MS-7C43 schematic, you can diagnose and repair common issues efficiently.
For tips on chip-level repair of laptop and desktop motherboards, visit our YouTube channel Repair Assistant and subscribe to our Facebook page repairassiastantbd for repair resource updates.
📥 Download the MS-7C43 schematic diagram now and take your motherboard repair skills to the next level!