Fix Gigabyte GA-H61M-USB3V Motherboard Chip-Level Faults in Just 30 Minutes Using the GA-H61M-USB3V BoardView File
When it comes to repairing desktop motherboards, time and accuracy are the two most crucial factors. For motherboard technicians, having the right resources can be the difference between a quick, successful repair and hours of unnecessary troubleshooting. One such essential resource is the GA-H61M-USB3V BoardView File — a detailed schematic visualization that simplifies the chip-level repair process for the Gigabyte GA-H61M-USB3V motherboard.
If you’re a technician working on Desktop Computer motherboards, understanding how to use the GA-H61M-USB3V BoardView File can help you identify faults faster, perform accurate diagnostics, and restore functionality within just 30 minutes.
What is the GA-H61M-USB3V BoardView File?
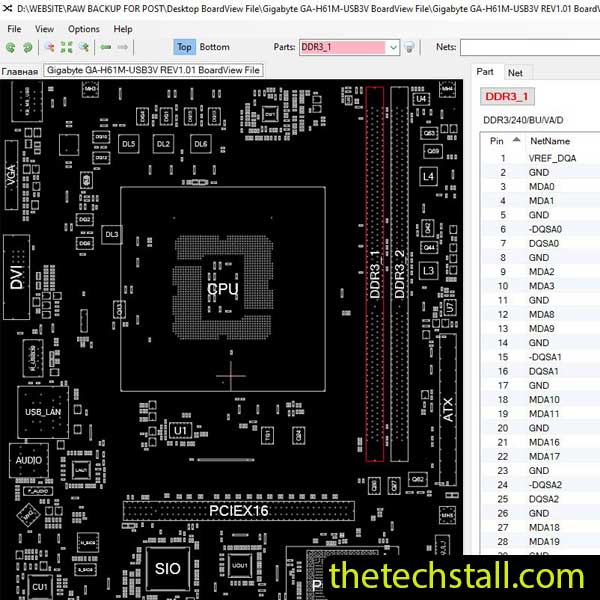
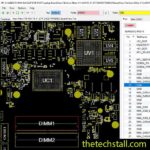
The GA-H61M-USB3V BoardView File is a digital map of the Gigabyte GA-H61M-USB3V motherboard. It visually displays the components, connections, and layers of the board, allowing you to trace signals and locate components without having to rely solely on physical inspection.
Unlike PDF schematics, the BoardView file gives you an interactive interface to explore each component and net. It helps you identify short circuits, broken traces, missing voltages, and faulty components in record time. For technicians specializing in Desktop computer motherboards, this BoardView file is an invaluable tool that streamlines every stage of the diagnostic and repair process.
Why the GA-H61M-USB3V BoardView File is a Must-Have for Technicians
Faster Fault Detection: With the GA-H61M-USB3V BoardView File, you can immediately pinpoint problematic areas on the motherboard. It eliminates the guesswork and helps you move directly to the root cause of the issue — saving precious repair time.
Component-Level Insight: The BoardView file shows all components, from the CPU power supply circuits to the smallest capacitors and resistors. Each part is labeled, making it easier to compare with a known-good board or to test specific areas using a multimeter or oscilloscope.
Simplified Tracing: Tracing voltage or signal paths manually can be frustrating. With the GA-H61M-USB3V BoardView File, you can follow traces digitally and identify where a connection is lost. This makes fixing open lines or shorted circuits much more efficient.
Compatibility with Popular BoardView Software: You can open the GA-H61M-USB3V BoardView File using tools such as OpenBoardView, BoardViewer software. These programs provide easy navigation, zoom, and search options to enhance your repair workflow.
Step-by-Step: Fix Gigabyte GA-H61M-USB3V Faults in 30 Minutes
Here’s how experienced technicians use the GA-H61M-USB3V BoardView File to repair motherboards efficiently:
Initial Inspection: Begin by checking for physical damage, burn marks, or corrosion. Then, open the GA-H61M-USB3V BoardView File alongside the motherboard on your workbench.
Locate the Fault Area: Using the file, navigate to the section of the board responsible for the faulty function. For example, if the board shows no power, check the 3.3V, 5V, and CPU Vcore power rails. The BoardView file will show you the exact components related to those circuits.
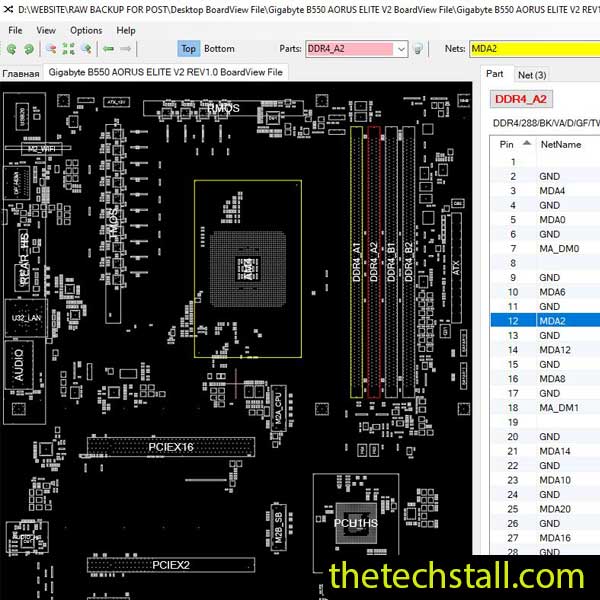
Signal Tracing: Trace signals using the net search feature in the BoardView software. You can quickly see where a voltage line starts, ends, and if there’s a break or short.
Testing Components: With the component names and values visible in the BoardView, test specific transistors, MOSFETs, or capacitors with your multimeter. Replace or reflow defective components as needed.
Verification: After the repair, reassemble and power on the motherboard. You’ll notice that most chip-level faults, whether they are no display, no power, or USB malfunction issues, can be fixed in under 30 minutes with the right diagnosis and use of the GA-H61M-USB3V BoardView File.
Other Repair Resources to Use with the Gigabyte GA-H61M-USB3V BoardView File
To achieve maximum efficiency in motherboard repairs, combine the GA-H61M-USB3V BoardView File with the following resources:
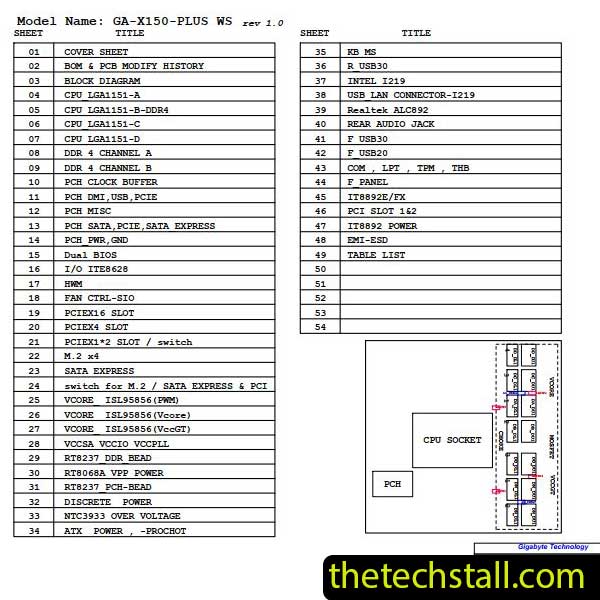
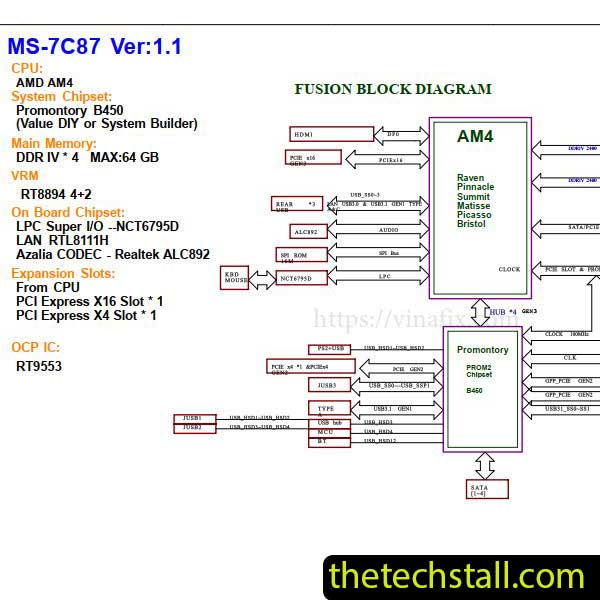
Gigabyte GA-H61M-USB3V Schematic Diagram: The schematic provides circuit logic and voltage references that complement the BoardView visualization.
BIOS Bin File: A corrupted BIOS is a common issue. Having the latest BIOS bin file allows you to reprogram and restore the motherboard firmware.
Component Datasheets: Use datasheets for ICs and MOSFETs to understand pinouts and expected voltage readings.
Power Rail Reference Charts: For power-related issues, voltage reference charts can help identify whether a specific power rail is within the normal range.
Thermal Camera or IR Gun: Detect overheating components quickly while cross-referencing their location in the GA-H61M-USB3V BoardView File.
When all these tools are used together, even the most challenging chip-level repairs become systematic and fast.
The GA-H61M-USB3V BoardView File is a powerful asset for any motherboard technician who wants to minimize repair time and maximize accuracy. Whether you are diagnosing no power, no display, or short circuit issues, this BoardView file provides the detailed insight needed to perform reliable and quick chip-level repairs.
For tips on chip-level repair of laptop and desktop motherboards, visit our YouTube channel Repair Assistant and subscribe to our Facebook page repairassiastantbd for repair resource updates.
Instead of wasting hours tracing signals manually, use the GA-H61M-USB3V BoardView File to visualize the motherboard in detail and fix problems efficiently.
This may be your best resource for fixing desktop motherboard chiplevel faults