When it comes to repairing and diagnosing desktop motherboards, having the right technical resources is crucial. For technicians working on Biostar IB25C-AHS motherboards, the TB250 BTC Schematic Diagram is an invaluable tool. This schematic file helps you trace circuits, identify components, and fix chip-level faults with accuracy and confidence. In this blog, we’ll explore how this diagram works, why it’s useful, and what additional resources you can combine with it for successful motherboard repairs.
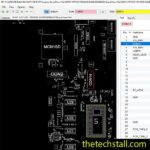
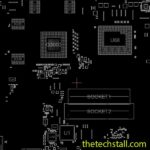
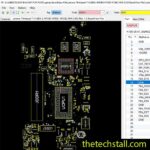
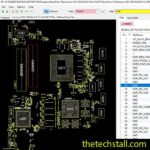
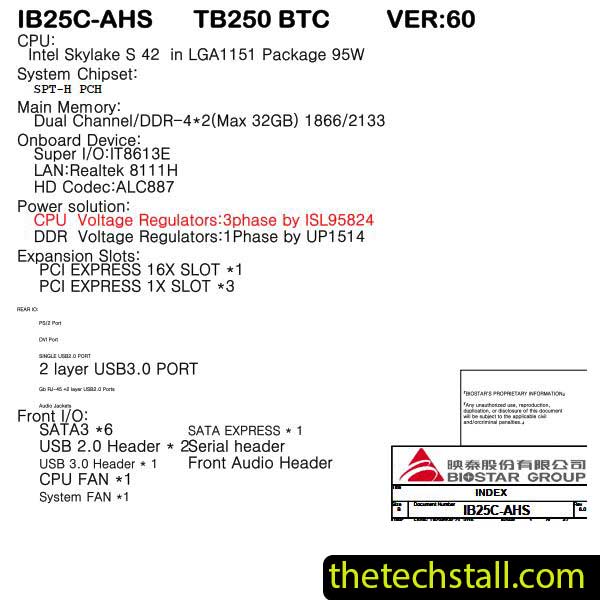
The TB250 BTC Schematic Diagram is a detailed technical drawing of the TB250 BTC motherboard, which is commonly found in desktop motherboard models such as Biostar IB25C-AHS. This schematic acts as a roadmap for technicians, showing how every component is connected and how power flows across the motherboard.
Whether you’re repairing power issues, no-display errors, or troubleshooting dead boards, this schematic allows you to quickly locate problem areas without guesswork. It is essentially a blueprint that eliminates trial-and-error and makes repairs faster, more efficient, and more professional.
Here’s a step-by-step guideline on how you can effectively use the schematic file during motherboard repairs:
With practice, using the TB250 BTC Schematic Diagram becomes second nature, and it significantly boosts repair success rates.
While the schematic is the foundation of motherboard repair, combining it with other resources makes the process smoother:
By combining the TB250 BTC Schematic Diagram with these tools, you’ll be fully equipped to handle even the toughest chip-level faults.
If you specialize in desktop motherboard repairs, this schematic can save hours of diagnostic time. The TB250 BTC motherboard is widely used, and having access to its schematic means you’re ready to tackle common issues like:
Every professional motherboard technician knows the difference the right diagram makes. Instead of relying on assumptions, you’ll be working with precise, manufacturer-level information.
To make your repair work easier, we are providing a free download link for the TB250 BTC Schematic Diagram. With this schematic in hand, repairing Biostar IB25C-AHS motherboards will become much more straightforward and efficient.
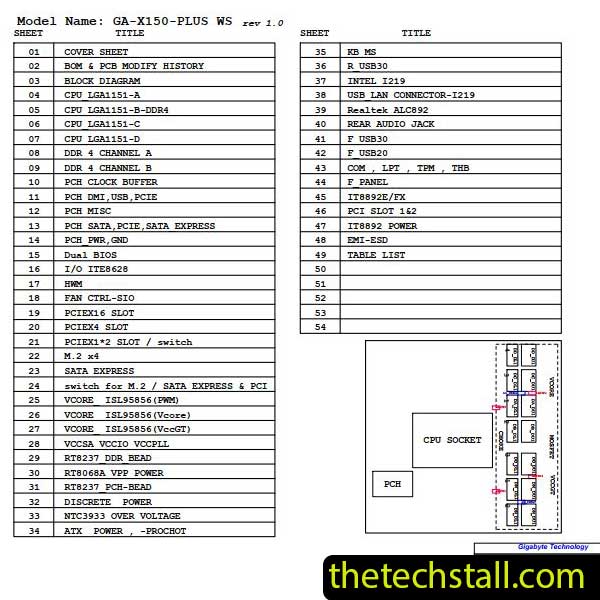
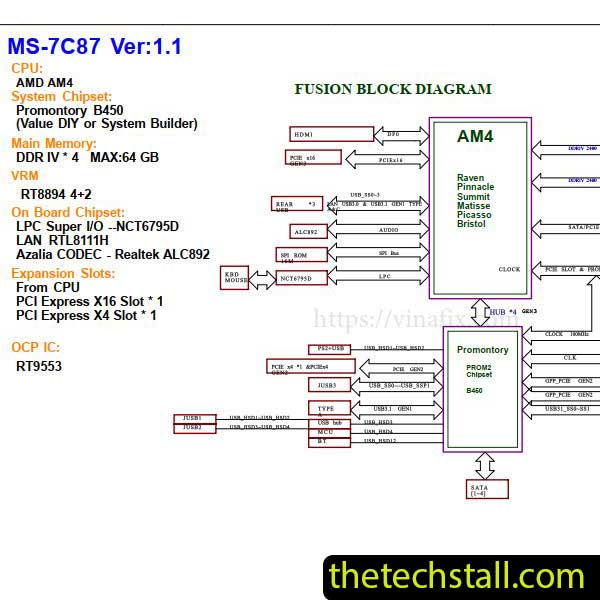
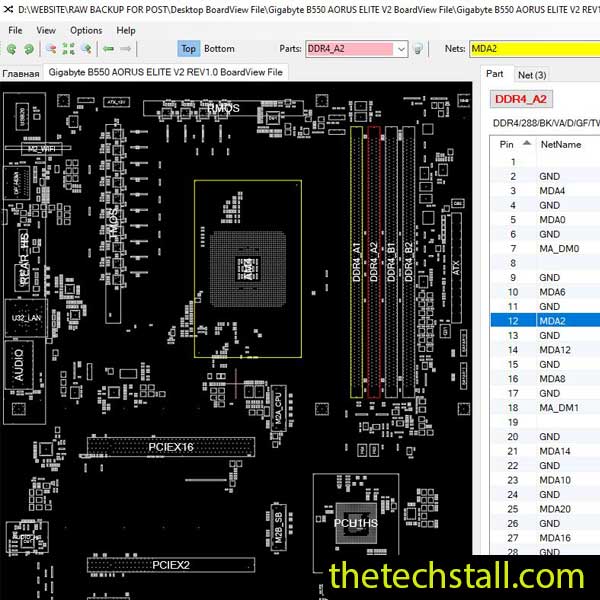
Download “Biostar IB25C-AHS TB250 BTC REV6.0 Schematic Diagram” view – Downloaded 261 times – 104.54 KBThe TB250 BTC Schematic Diagram is one of the most powerful resources a technician can use for chip-level repairs. By guiding you through circuit paths, component functions, and voltage checks, it eliminates guesswork and speeds up the repair process. When combined with BoardView files, datasheets, and the right test equipment, it becomes an unstoppable tool for solving complex motherboard faults.

For tips on chip-level repair of laptop and desktop motherboards, visit our YouTube channel Repair Assistant and subscribe to our Facebook page repairassiastantbd for repair resource updates.
If you work with motherboards repair regularly, make sure you keep this schematic on hand—you’ll find it indispensable for professional, reliable repairs.
This may be your best resource for fixing desktop motherboard chiplevel faults.