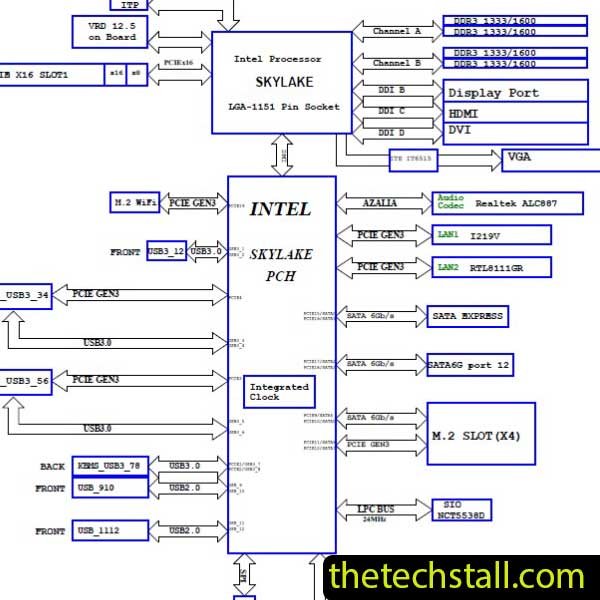
When your ASUS desktop starts acting up, it can be frustrating to pinpoint the root cause. Whether it’s random reboots, unresponsive USB ports, or audio problems, your motherboard could be the culprit. But don’t worry—troubleshooting these issues doesn’t have to be a daunting task, especially if you have the right tools at your disposal. One of the most valuable resources for tackling motherboard problems is the schematic diagram. Specifically, the ASUS H110I-PLUS-D3-MS schematic diagram is a free and incredibly useful tool that can help you identify and resolve issues with your ASUS desktop motherboard.
The ASUS H110I-PLUS-D3-MS schematic diagram is a detailed blueprint of the motherboard’s electrical pathways. It provides an intricate map of all the connections, components, and circuits on the motherboard, allowing you to see exactly how everything is connected. This can be incredibly helpful when trying to diagnose hardware issues, as it gives you a clear view of the motherboard’s design and layout.
When troubleshooting a motherboard issue, having a schematic diagram is like having a roadmap to your destination. It allows you to:
Boardview files are essential for anyone involved in the repair and maintenance of desktop motherboards. These detailed schematics provide a visual representation of the motherboard’s circuitry, enabling technicians to identify component connections, trace faults, and perform precise repairs. By downloading free boardview files, repair professionals can save time and increase accuracy, making it easier to troubleshoot and fix issues without guesswork. This resource is invaluable for ensuring that every repair is executed with precision, ultimately extending the life of your hardware.
Using the ASUS H110I-PLUS-D3-MS schematic diagram is straightforward, even if you’re not an expert in electronics. Here’s a step-by-step guide:
TechStall support team has an official Facebook page and a YouTube channel, from where you can get Desktop and laptop motherboard repair resource update information.Download “ASUS H110I-PLUS-D3-MS Schematic Diagram” view – Downloaded 171 times – 87.56 KB
The ASUS H110I-PLUS-D3-MS schematic diagram is an essential tool for anyone looking to troubleshoot and repair their ASUS desktop motherboard. It provides a detailed view of the motherboard’s layout, making it easier to identify and resolve issues quickly and efficiently. By using this free resource, you can save time, money, and the frustration of dealing with motherboard problems on your own.
Whether you’re a tech enthusiast or just someone trying to fix a pesky issue with your computer, the ASUS H110I-PLUS-D3-MS schematic diagram is your key to a smoother troubleshooting experience. Download it today and take the guesswork out of motherboard repairs.
Share with friends
thetechstall.com would like to share with you all the resources you need to repair desktop and laptop motherboards for free.
Developed By: Ibrahim Hossen