If you’re a laptop chip-level technician, dealing with motherboard issues can be a challenging task. The Acer Aspire Switch 11 is a popular laptop, but like any high-performance machine, it can develop motherboard faults over time. To repair such issues efficiently, having the correct schematic diagram is crucial. In this article, we’ll guide you through common motherboard problems, troubleshooting techniques, and provide a free download link for the Pegatron P1HBC schematic diagram to help you diagnose and fix faults with precision.
Understanding the Pegatron P1HBC Schematic Diagram
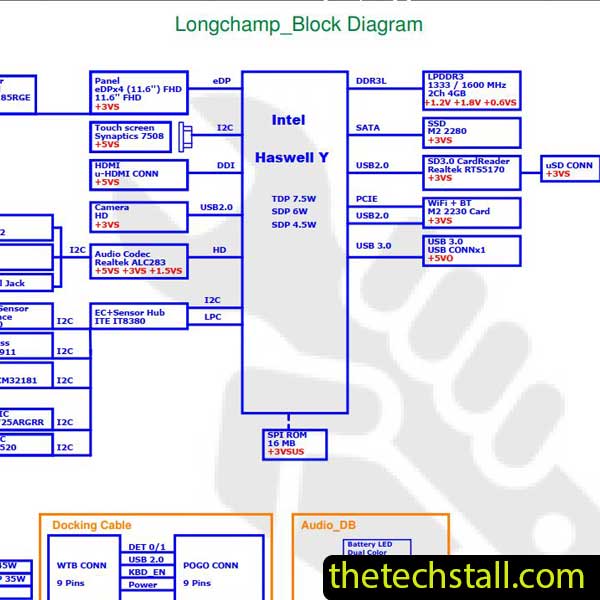
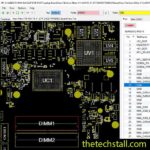
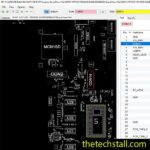
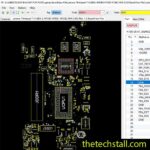
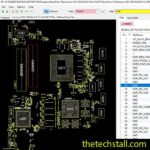
The Acer Aspire Switch 11 features the Pegatron P1HBC motherboard, a robust and high-performance circuit board that powers the laptop. The schematic diagram for this motherboard provides detailed insights into:
Voltage rails and power sequences
Chipset and CPU power delivery
GPU and VRAM connectivity
BIOS circuits and EC (Embedded Controller) connections
I/O ports and peripheral components
With this information, technicians can diagnose problems such as no power, short circuits, charging issues, and dead motherboards with accuracy.
Common Chip-Level Issues in Acer Aspire Switch 11 Laptop Motherboard
The Acer Aspire Switch 11 is a powerful laptop, but like any other device, its motherboard can develop issues over time. Here are some of the most common chip-level problems you might encounter:
1. No Power / Dead Laptop
Symptoms: Laptop does not turn on, no fan movement, no LED indications.
Possible Causes:
Faulty power IC or MOSFETs
Corrupt BIOS
Damaged charging circuit
Solution: Using the Pegatron P1HBC schematic diagram, check the power rail sequences, identify faulty components, and replace them accordingly.
2. Charging Issues
Symptoms: Battery not charging, laptop only runs on AC power.
Possible Causes:
Defective charging IC
Broken charging port or damaged traces
Solution: Use the schematic diagram to trace the battery charging circuit and replace faulty ICs or components.
3. No Display / Black Screen Issue
Symptoms: Laptop powers on but no display on screen.
Possible Causes:
GPU failure
BIOS corruption
Loose or damaged LVDS/eDP cable
Solution: Refer to the Pegatron P1HBC schematic diagram to inspect display power rails, replace faulty capacitors, and reflash BIOS if needed.
4. Overheating and Automatic Shutdown
Symptoms: Laptop turns off randomly, excessive heat.
Possible Causes:
Faulty thermal sensors
Poor thermal paste application
Overloaded VRMs
Solution: Check temperature sensor circuits and VRM power delivery using the schematic to identify overheating components.
Why You Need the Pegatron P1HBC Schematic Diagram
A schematic diagram is like a roadmap for a motherboard. It provides a detailed layout of all the components, their connections, and the flow of signals across the board. For chip-level technicians, having access to the Pegatron P1HBC schematic diagram is invaluable for the following reasons:
Accurate Diagnosis
The schematic diagram helps you pinpoint the exact location of faulty components, saving time and effort.
Efficient Repairs
With a clear understanding of the circuitry, you can replace or repair components with precision.
Troubleshooting Power Issues
The diagram provides insights into the power delivery system, making it easier to identify issues with voltage regulators, MOSFETs, and other power-related components.
Understanding Signal Flow
By following the signal paths, you can identify breaks or shorts in the circuit and restore functionality.
Learning and Skill Development
Studying the schematic diagram enhances your understanding of motherboard design and improves your troubleshooting skills.
How to Use the Pegatron P1HBC Schematic Diagram
Here’s a step-by-step guide to using the Pegatron P1HBC schematic diagram for repairing the Acer Aspire Switch 11 laptop motherboard:
Identify the Problem
Start by diagnosing the issue. For example, if the laptop isn’t powering on, check the power button circuit and the main power rail.
Locate the Relevant Section
Use the schematic diagram to find the section related to the problem. For power issues, focus on the power delivery section.
Check Component Values
Verify the values of resistors, capacitors, and other components in the circuit. Compare them with the values specified in the schematic.
Test Voltage Levels
Use a multimeter to measure voltage levels at key points in the circuit. Compare your readings with the expected values in the schematic.
Replace Faulty Components
If you identify a faulty component, replace it with a compatible part. Ensure proper soldering and alignment.
Verify the Repair
After replacing the component, test the laptop to ensure the issue is resolved.
Download the Free Pegatron P1HBC Schematic Diagram
To assist you in repairing Acer Aspire Switch 11 motherboard issues, we are providing a free download link for the Pegatron P1HBC schematic diagram below:
Repairing the Acer Aspire Switch 11 laptop motherboard doesn’t have to be a daunting task. With the right knowledge, tools, and resources like the Pegatron P1HBC schematic diagram, you can diagnose and fix chip-level issues efficiently. Don’t forget to download your free schematic diagram using the link provided above.
By mastering the use of schematic diagrams, you’ll not only improve your repair skills but also save time and money. Happy repairing!
For tips on chip-level repair of laptop and desktop motherboards, visit our YouTube channel Repair Assistant and subscribe to our Facebook page repairassiastantbd for repair resource updates.