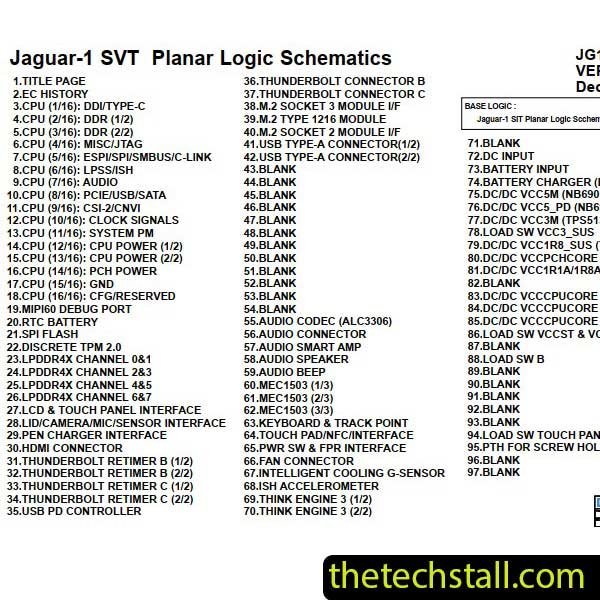
When it comes to repairing laptops, especially models like the Lenovo ThinkPad X1 Yoga Gen6, having the right tools and information is critical. One such crucial tool is the NM-D341 schematic diagram. This detailed guide is indispensable for anyone looking to efficiently repair the Lenovo ThinkPad X1 Yoga Gen6 motherboard. Here’s why this schematic diagram is so essential for a successful repair process.
The NM-D341 schematic diagram is a comprehensive blueprint of the Lenovo ThinkPad X1 Yoga Gen6 laptop’s motherboard. It includes detailed information about the circuitry, components, and their interconnections. This schematic acts as a roadmap, guiding technicians through the complex landscape of the motherboard’s design.
Level Up Your Tech Skills: Dive into Laptop Motherboard Chip-Level Repair!
One of the most significant advantages of using the NM-D341 schematic diagram is its ability to facilitate accurate diagnostics. With this diagram, technicians can trace the flow of electricity and identify where issues may be occurring. Whether it’s a faulty capacitor, a broken trace, or a malfunctioning IC, the schematic helps pinpoint the problem quickly.
Time is of the essence when it comes to repairing electronics. The NM-D341 schematic diagram allows for efficient troubleshooting by providing clear and concise information about the motherboard’s layout. This means less time spent guessing and more time spent fixing the issue.
Motherboards are packed with tiny, often similar-looking components. The schematic diagram helps in identifying each component accurately, ensuring that the right parts are targeted during repairs. This is crucial for avoiding mistakes that could further damage the motherboard.
For technicians, especially those who may not be familiar with the Lenovo ThinkPad X1 Yoga Gen6 model, the NM-D341 schematic diagram acts as a guide. It provides step-by-step information on the motherboard’s design and function, making the repair process more straightforward and less intimidating.
Using the schematic diagram can lead to more cost-effective repairs. By accurately diagnosing and fixing only the faulty components, technicians can avoid the unnecessary replacement of entire motherboard sections. This not only saves money but also reduces electronic waste.
NM-D341 Schematic Diagram Free Download from us here. Once you have the schematic, here are a few tips on how to use it effectively:
Our schematic diagrams are in PDF format which can be opened using Adobe Acrobat Reader or PDF Reader & Viewer.
Download “Lenovo ThinkPad X1 Yoga Gen6 NM-D341 Schematic Diagram” view – Downloaded 306 times – 82.84 KBThe NM-D341 schematic diagram is a vital resource for anyone looking to repair the Lenovo ThinkPad X1 Yoga Gen6 laptop motherboard. Its detailed insights into the motherboard’s design enable accurate diagnostics, efficient troubleshooting, and guided repairs. By leveraging this schematic, technicians can perform repairs more effectively and economically, ensuring the longevity and functionality of the Lenovo ThinkPad X1 Yoga Gen6 laptop.
In the world of laptop repair, knowledge is power, and the NM-D341 schematic diagram provides that essential knowledge, making it an invaluable tool for any technician.
Share with friends
thetechstall.com would like to share with you all the resources you need to repair desktop and laptop motherboards for free.
Developed By: Ibrahim Hossen