As a professional laptop motherboard technician, you know that some repairs feel like navigating a maze blindfolded. You’ve got the symptoms, a multimeter, and a schematic diagram, but pinpointing the exact micro-component failure on a complex motherboard can be a time-consuming and frustrating process. When dealing with specific models like the ASUS X200CA, precision is key to a quick and successful fix. The secret weapon in your arsenal that bridges the gap between a schematic and the physical board layout is a BoardView file. Specifically, the X200CA BoardView file is an absolute game-changer for chip-level repairs on the ASUS X200CA motherboard.
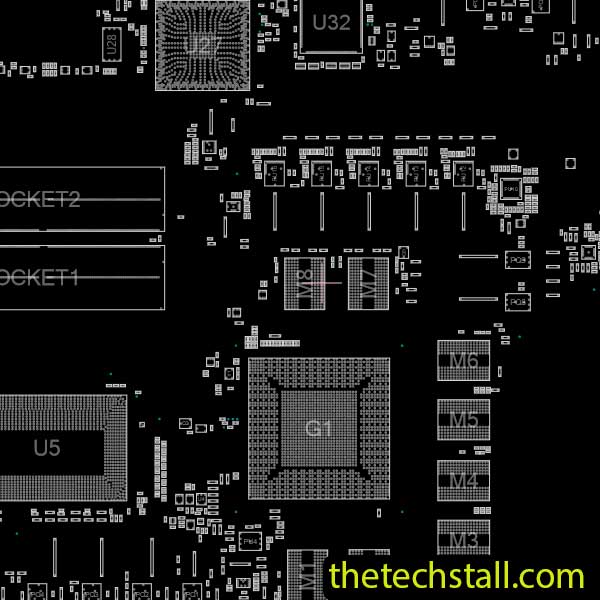
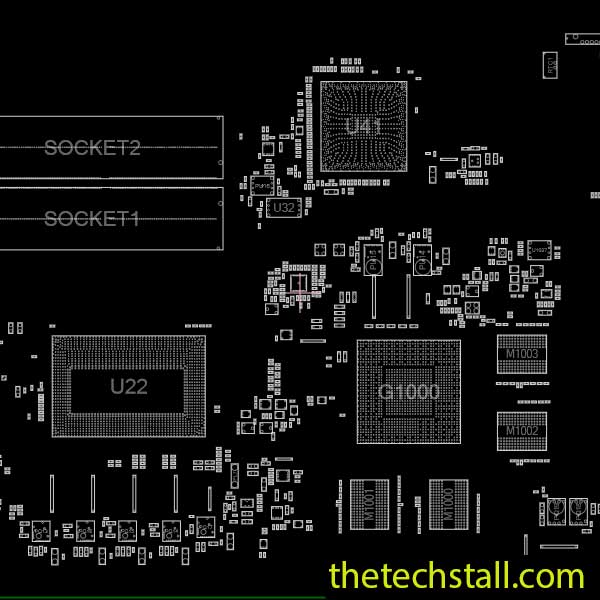
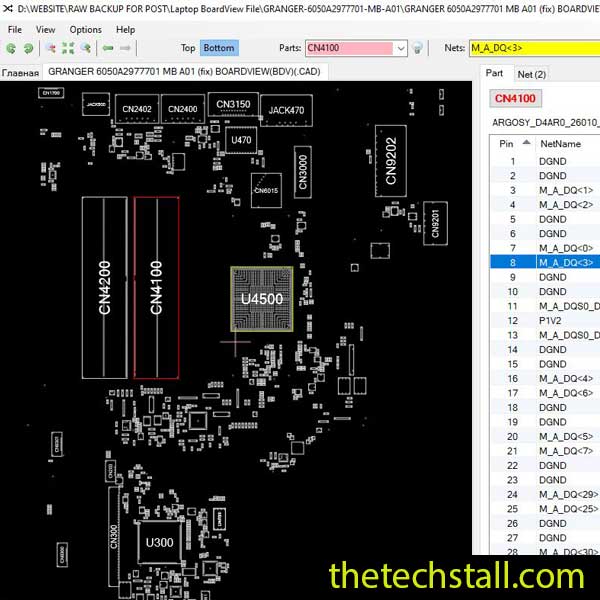
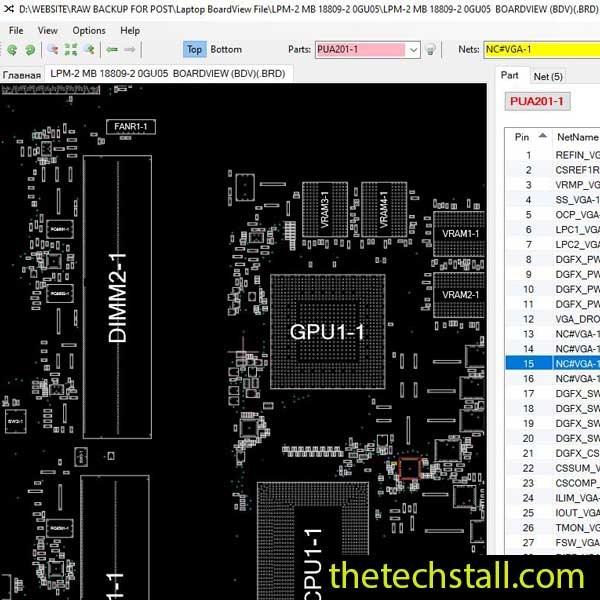
The X200CA BoardView file is a specialized digital schematic layout that helps technicians visually navigate the motherboard of the ASUS X200CA. Think of a traditional schematic diagram as the blueprint of a building—it shows you where all the systems are meant to connect. A BoardView file, however, is like an interactive, X-ray view of the completed structure. It is a digital map that displays the motherboard’s physical layout, allowing you to click on any component (resistor, capacitor, IC, etc.) and instantly see exactly which traces it connects to, its value, and its corresponding reference designator as listed in the schematic.
With this file, you can instantly identify components, test points, connectors, and circuit pathways. This visual reference saves enormous amounts of time during troubleshooting—especially when dealing with short circuits, missing voltages, or damaged ICs.
Modern motherboards are complex. Without a BoardView file, tracing a signal or finding a faulty component is like navigating a maze blindfolded. The X200CA BoardView file acts as a digital map that simplifies this process by:

To start using the X200CA BoardView file, you’ll need BoardView viewer software such as OpenBoardView, Allegro Free Board Viewer, or BoardViewer 2.0.1.9(Beta). Here’s how you can make the most of it:
Open your preferred BoardView program and import the X200CA file. Once loaded, you’ll see a visual representation of the motherboard, complete with labeled components and pathways.
If the laptop isn’t powering on, start by checking the power rails. Use the BoardView file to find the DC jack connector and trace the VIN line to the power management ICs. You can visually see where each voltage line connects and locate test points for measuring voltages.
If there’s a specific component that’s heating up or not functioning, click on it in the BoardView. You’ll instantly see all its connected nodes, making it easy to check for shorts or missing signals.
For example, if you suspect a faulty charging circuit, the BoardView will show you all components connected to the charging IC—capacitors, MOSFETs, and sense resistors—so you can test each one methodically.
While the BoardView file shows the physical layout, combining it with the X200CA schematic diagram gives you full control over both the electrical and physical aspects of the board. You can cross-check component functions, pinouts, and circuit flow, making troubleshooting more effective.
Always take notes of your repair process using the BoardView file as a reference. Mark problematic areas or components so you can refer back to them later. This builds a personal database of repair experience that will help you diagnose similar issues faster in the future.
To maximize your repair efficiency, pair your X200CA BoardView file with these useful resources:
By integrating all these resources, you can perform complete chip-level motherboard repairs with precision and confidence.
Download “ASUS X200CA MB 2.0 & 2.1 Boardview File” X200CA-MB-2.0-2.1-Boardview.zip – Downloaded 838 times – 209.86 KBThe X200CA BoardView file is an indispensable tool for any technician working on ASUS X200CA motherboards. Whether you’re diagnosing power issues, tracing data lines, or identifying shorted components, this file provides the roadmap you need to work faster and smarter. Combined with schematics, datasheets, and proper testing tools, it can drastically improve your repair accuracy and turnaround time.

For tips on chip-level repair of laptop and desktop motherboards, visit our YouTube channel Repair Assistant and subscribe to our Facebook page repairassiastantbd for repair resource updates.