When it comes to repairing high-end gaming laptops, few devices challenge technicians as much as the ASUS UX360CA. Known for its powerful performance and advanced hardware, this machine is a favorite among gamers and tech enthusiasts alike. However, like any other sophisticated device, it’s not immune to motherboard-level faults. For those who specialize in chip-level laptop repair, the UX360CA schematic diagram is one of the most essential tools for diagnosing and fixing these issues effectively.
In this blog, we’ll explore how the UX360CA schematic diagram can help you troubleshoot and repair the ASUS UX360CA motherboard, where to download it, and what additional resources you can use to enhance your repair workflow.
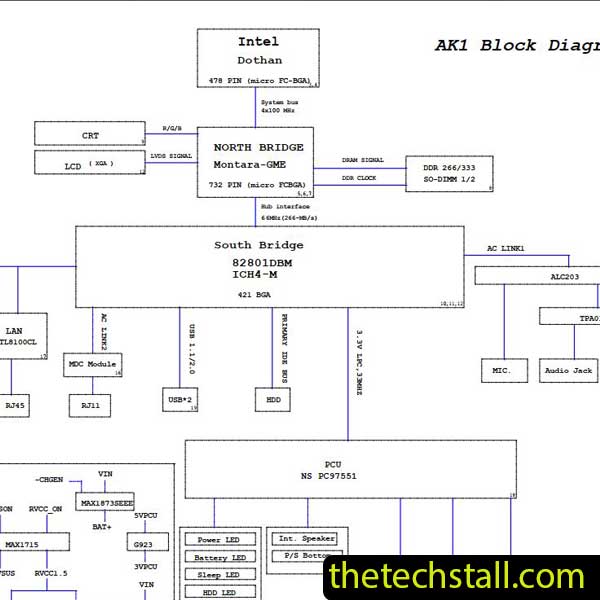
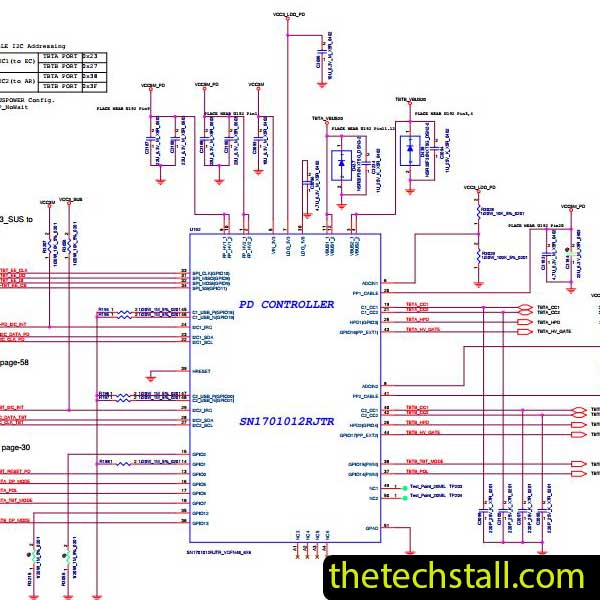
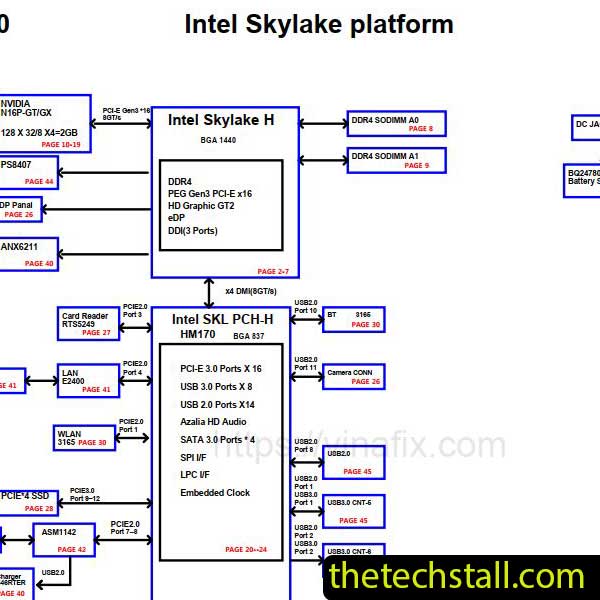
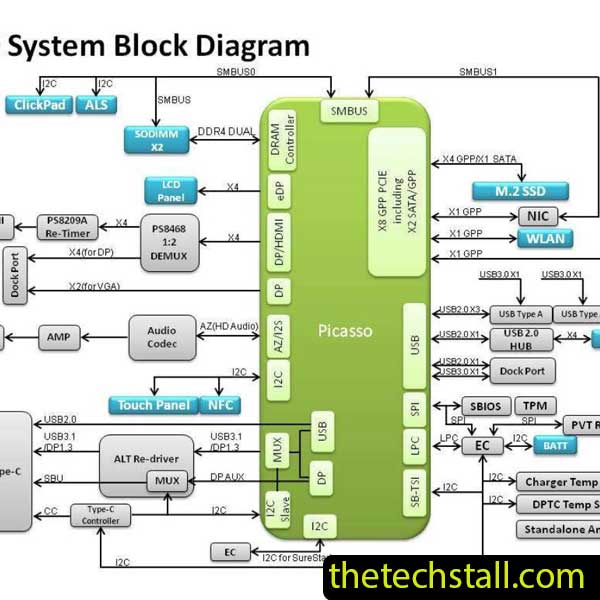
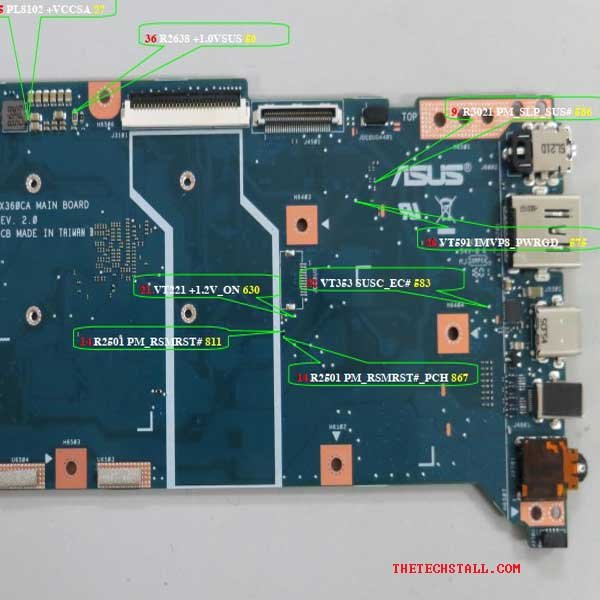
The UX360CA schematic diagram is the circuit-level blueprint of the ASUS UX360CA motherboard. It provides a detailed visual representation of every electronic connection, power rail, chipset, and signal path on the board. Whether you’re tracing a shorted power line, diagnosing a faulty GPU, or replacing a damaged component, having access to this schematic is like having a roadmap to the motherboard’s inner workings.
Many technicians face difficulties when working without the proper circuit information. Modern laptop motherboards are densely packed with SMD components, complex power management systems, and advanced chipsets. Without the UX360CA schematic, even experienced repair engineers might struggle to locate the root cause of a failure. This is why having the diagram is a must-have for anyone doing chip-level diagnostics.
Before diving into repairs, it’s important to know the common problems that technicians encounter with this particular model. The ASUS UX360CA uses high-performance components, and heat is often the biggest enemy. Here are some typical motherboard-level issues that can be solved using the UX360CA schematic diagram:
By using the UX360CA schematic diagram, you can pinpoint these issues quickly and avoid unnecessary part replacements, saving both time and cost.
Working without a schematic is like trying to find a destination without a map. In laptop motherboard repair, schematics give you the confidence and clarity to diagnose complex issues. The UX360CA schematic diagram not only helps identify problem areas but also improves your understanding of circuit behavior.
Here’s how it benefits your repair workflow:
Besides the UX360CA schematic diagram, there are several complementary resources that can make your repair process even more efficient:
If you’re currently working on a ASUS UX360CA motherboard repair, having the UX360CA schematic diagram is absolutely essential. It will guide you through every section of the board, helping you troubleshoot efficiently and with confidence.
Download “Asus UX360CA VER 2.0 Repair Guide” Asus-UX360CA-Repair-Guide.zip – Downloaded 420 times – 1.23 MBThe UX360CA schematic diagram is more than just a technical document — it’s a complete guide to understanding and repairing the ASUS UX360CA motherboard at the chip level. Whether you’re an experienced technician or just beginning your journey into motherboard diagnostics, having this schematic at your disposal can save hours of troubleshooting time and help you make precise, effective repairs.
By studying the UX360CA schematic, you gain a clear view of every power rail, signal line, and IC connection across the board. Pairing it with additional resources such as the boardview file, BIOS dump, and datasheets will further enhance your success rate in fixing no-power, charging, and display-related faults.

For tips on chip-level repair of laptop and desktop motherboards, visit our YouTube channel Repair Assistant and subscribe to our Facebook page repairassiastantbd for repair resource updates.
Don’t let complex motherboard problems slow you down — equip yourself with the right tools and knowledge.